Hello class! Did you bring your number 2 pencils today? I sure hope not! You should be taking your notes like a number 1!
That’s a silly teacher joke we in the “biz” use! But you know what’s not a joke? Horrible HUD screens! Nothing causes more frustration and disdain than having things in the worst possible order for how you like to live your life.
Giant icons taking up your vision and leaving you feeling cramped and disoriented! Believe me, I know the pain!

For the longest time, I dealt with the problem like any sane person would; being too scared to change anything in case it got complex or I broke something and could not get it back. But after many moons of suffering with the box-standard HUD I decided to do something about it and now you get to learn how to also! Assuming you did not know, of course. In which case you can read if you want, but you will only get enjoyment if you like how I write and will not learn anything at all. Unless I do know something you do not, in which case you will! That is how that works. You are welcome.
That said, dear students, as I am pressed for time in this class, we are going to split this lesson into two, with the next part coming next week! Exciting, is it not? I promise I will make it good!
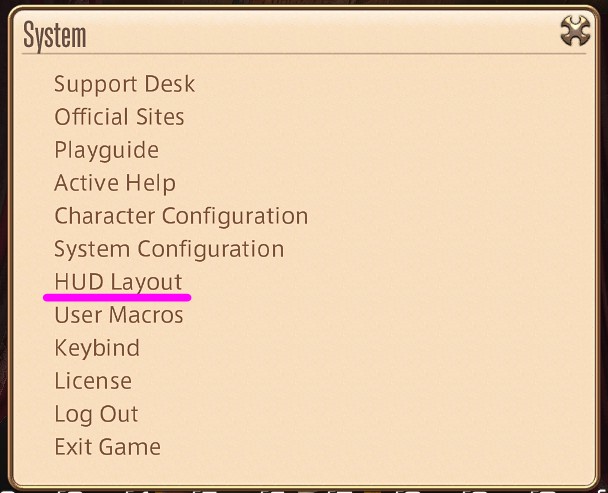
First, open the System Settings menu! You will want to bring up the “HUD Layout” which will make the screen look something like this:
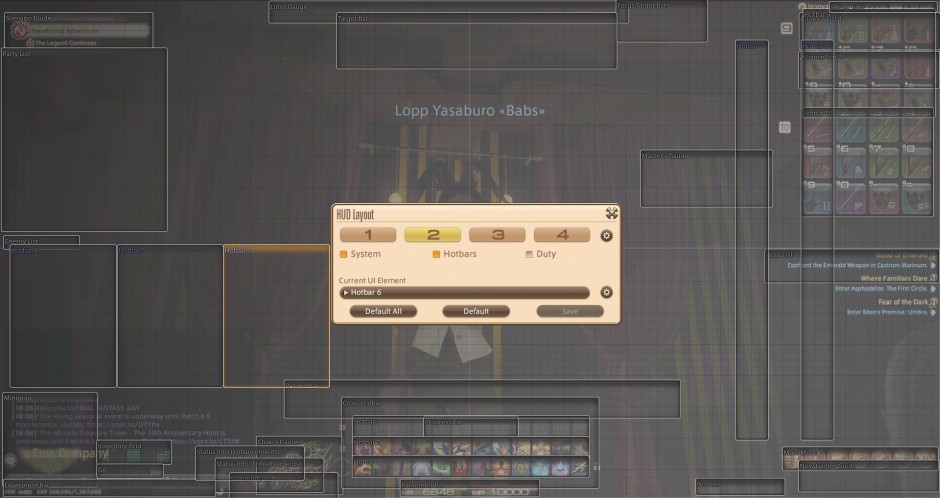
Oh look, the nightmare gets worse! Look at all those boxes, such a mess! And it really can be intimidating at first glance. I know that when I first saw it I thought I would scream. And then I did scream, potentially proving I can see the future, so remember that next time you think about cheating during a pop quiz!
For this lesson, we will be going over the basic functionality of how the editor works! First, click the object you want to manipulate. We will be using Hotbar 1, but you can select anything you would like!
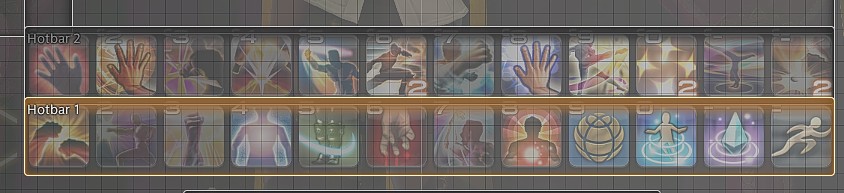
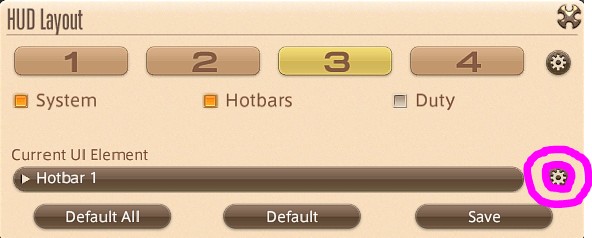
When you have it selected, the box will be highlighted in orange! The “HUD Layout” box will also change! But we are not ready, yet. Next, you need to click the gear that appears at the bottom right of the main selection box.
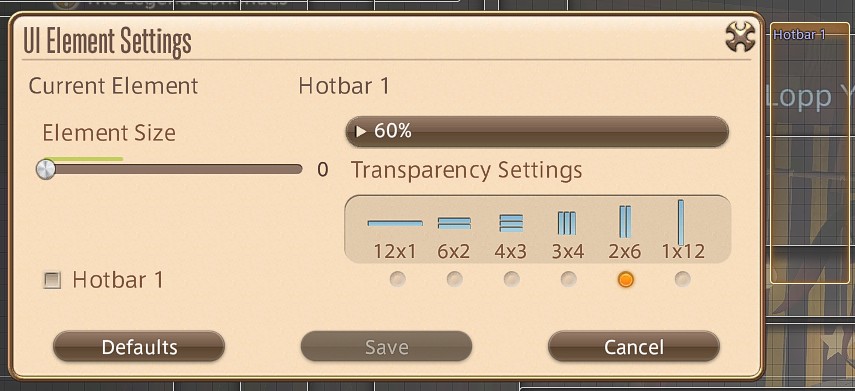
Doing that will convert it to the “UI Element Settings” box! When you have it on a Hotbar, it will look like the below:
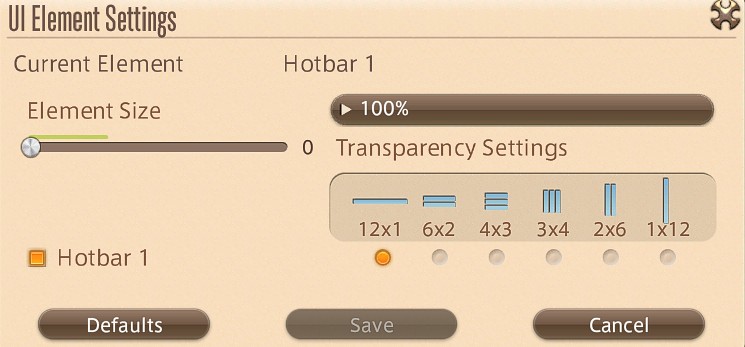
“Element Size” refers to that “100%” on the right. Opening that will let you receive the hotbar to be smaller or larger, whichever you like!
The slider bar on the left is the “Transparency Settings” which can be used to make the hotbar see-through! Why would you want to? I am not sure, but you can! Finally, in the bottom right, you can choose how the hotbar is arranged! The standard displays the icons in a straight line, but you can go more vertical or even in a square or rectangle! Wow! Take a look at the wacky things you can create!
In the second example, you may notice that Hotbar 1 is totally invisible, even though transparency is set to 0! How did I do that, you ask? Well, that will be a part of next week’s lesson! See you then, and do not forget to bring an apple in for me!